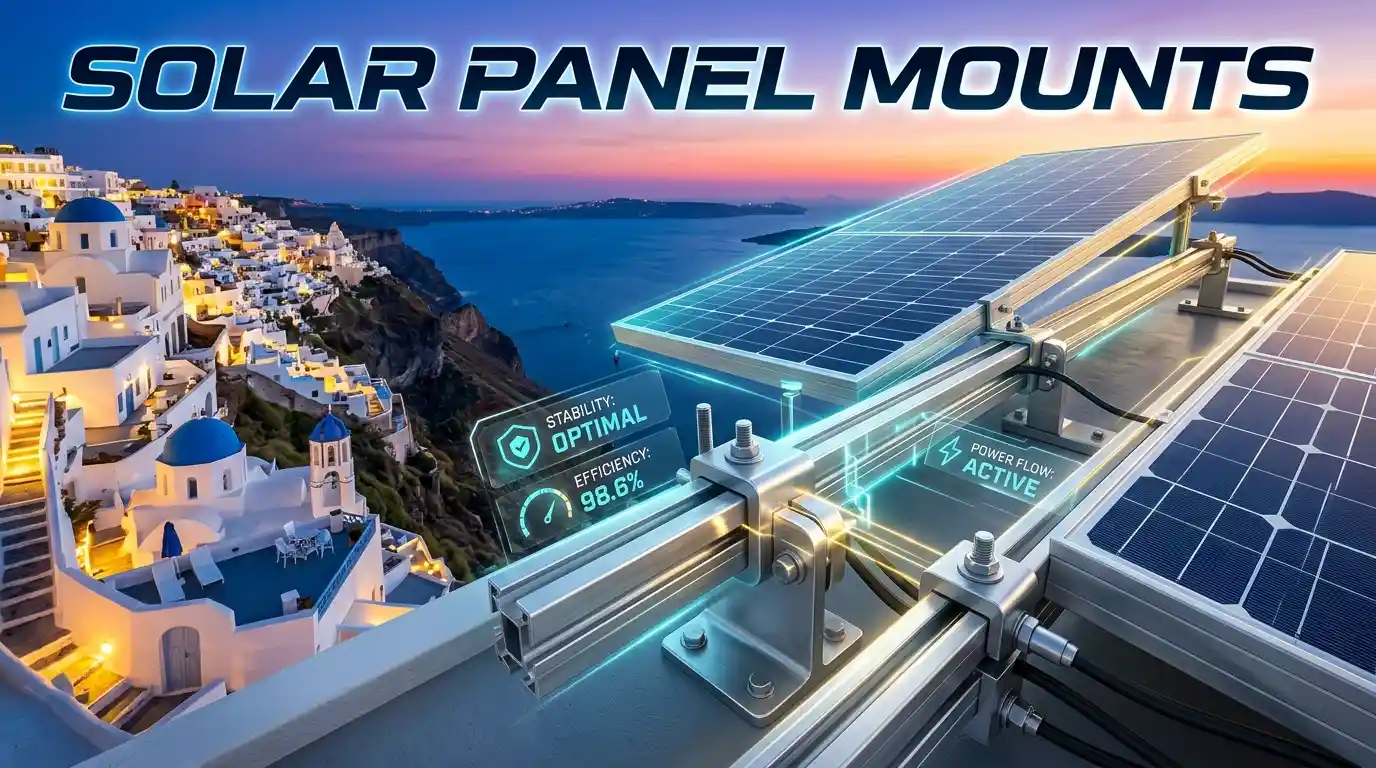
Solar Panel Mounting Brackets:
Complete Guide to Every Mount, Rack & Hardware (2026)
The right solar panel mounting brackets are the foundation of your entire solar system. A poorly chosen or incorrectly installed mount leads to panel failures, roof leaks, voided warranties, and — in worst cases — panels blown off your roof in a storm. A properly engineered mounting system, on the other hand, keeps your panels optimally angled, structurally secure, and producing maximum power for 25+ years.
This guide covers every type of solar panel mount — from simple Z brackets for RVs to engineered ground mount racking systems — with detailed installation guidance, hardware recommendations, and cost breakdowns for US homeowners and DIYers.
The most common solar panel mounts are: rail-based roof mounts (standard homes), Z brackets (RVs and flat surfaces), ground mount frames (yard installations), and pole mounts (remote locations). All should be made from anodized aluminum or stainless steel and rated for your local wind and snow loads.
1. What Are Solar Panel Mounting Brackets?
Solar panel mounting brackets are the structural hardware that physically attaches solar panels to a surface — your roof, the ground, a pole, a wall, or your RV. They are the mechanical interface between your expensive solar panels and whatever they’re mounted to.
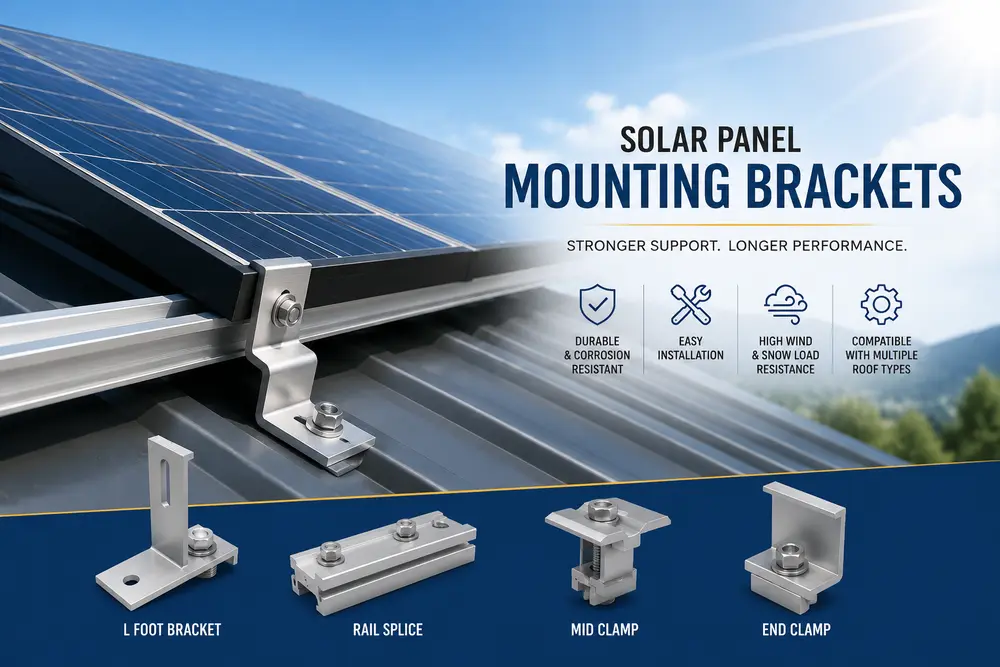
A complete solar panel mounting system typically includes:
- Roof attachments / L-foot brackets: Bolt into roof rafters to anchor the entire system
- Mounting rails: Aluminum tracks that span across multiple panels
- Mid clamps: Secure adjacent panels to the rail between them
- End clamps: Secure panels at the outer edges of the array
- Flashing / waterproof boots: Prevent water intrusion at roof penetration points
- Grounding hardware: Bonding lugs and grounding wires per NEC 690
Solar panel mounting brackets with hardware kits bundle all of these components together — the most convenient option for DIY installers who don’t want to source parts separately.
Solar panel racking and mounting hardware typically accounts for 8–12% of total system cost. On a $20,000 residential installation, that’s $1,600–$2,400 for mounting alone. Choosing quality mounting hardware is not where to cut corners — a failed mount can destroy panels worth 10x the cost of better brackets.
2. 8 Types of Solar Panel Mounts — Which Is Right for You?
Roof Rail Mount
Industry standard for residential shingle roofs. Rails attach to rafters; panels clamp to rails. Most versatile and structurally strong.
Most PopularGround Mount
Freestanding frame installed in the yard. Ideal when roof isn’t suitable. Easier maintenance and better airflow for panels.
Best PerformanceZ Brackets
Simple, affordable brackets that mount panels directly to flat surfaces. Perfect for RVs, vans, sheds, and flat roofs without rails.
DIY FriendlyPole Mount
Panels elevated on a single steel pole. Great for remote locations, tracking systems, and off-grid setups with no suitable roof.
Off-Grid FavoriteRV / Van Mount
Low-profile flat brackets or tiltable mounts for RV roofs. Must be sealed thoroughly at every roof penetration point.
Mobile SolarWall Mount
Brackets that attach panels vertically to a wall or vertical surface. Used in urban settings, balconies, and south-facing walls.
Space-SavingAdjustable Tilt Mount
Brackets that let you change the panel angle seasonally. Up to 25% more output vs fixed flat mount across the year.
Max EfficiencySun Tracker Mount
Motorized system that follows the sun throughout the day. Most expensive option but maximizes daily energy harvest significantly.
Commercial Use3. Roof Mount Solar Panels: Shingle, Tile & Flat Roofs
Roof mount solar panels are the most common installation type in the US — roughly 80% of residential solar systems use a rooftop mounting approach. The system uses a solar panel roof mounting assembly of L-foot brackets, rails, and clamps that bolts directly into roof rafters.
Solar Panel Roof Mounting Kit Components
A complete solar panel roof mounting kit includes:
- L-foot or T-foot brackets — attach to rafters via lag bolts (5/16″ minimum diameter)
- Flashing — waterproof metal cover over each lag bolt penetration
- Mounting rails — aluminum extrusions, typically 10–14 feet long per run
- Splice bars — connect rail sections end to end
- Mid clamps and end clamps — secure each panel to the rail
- Grounding lugs and bonding wire — per NEC Article 690
Roof Mounting Brackets for Solar Panels by Roof Type
| Roof Type | Recommended Mount | Special Hardware Needed | DIY Difficulty |
|---|---|---|---|
| Asphalt Shingle | Standard L-foot + rail system | Flashing (e.g. Quick Mount PV) | Moderate |
| Metal Standing Seam | Seam clamps — no roof penetrations! | Standing seam clamps (S-5! brand) | Easy |
| Metal Corrugated / Tin | Metal roof brackets with neoprene seal | Self-drilling tek screws + EPDM washers | Moderate |
| Flat / Low-Slope | Ballasted ground-level tilt frames | Concrete ballast blocks, no penetrations | Moderate |
| Concrete / Clay Tile | Tile hooks or tile-replacement mounts | Roof tile hooks, custom flashing | Hard — hire pro |
| Slate | Specialist slate hooks | Slate hooks; fragile roof — always use pro | Always hire pro |
Roof mounting brackets for solar panels must always anchor into roof rafters — never just the sheathing or decking boards. Sheathing alone cannot support the combined weight of panels plus wind uplift forces. Use a stud finder to locate rafters (typically 16″ or 24″ on center) before drilling any holes.
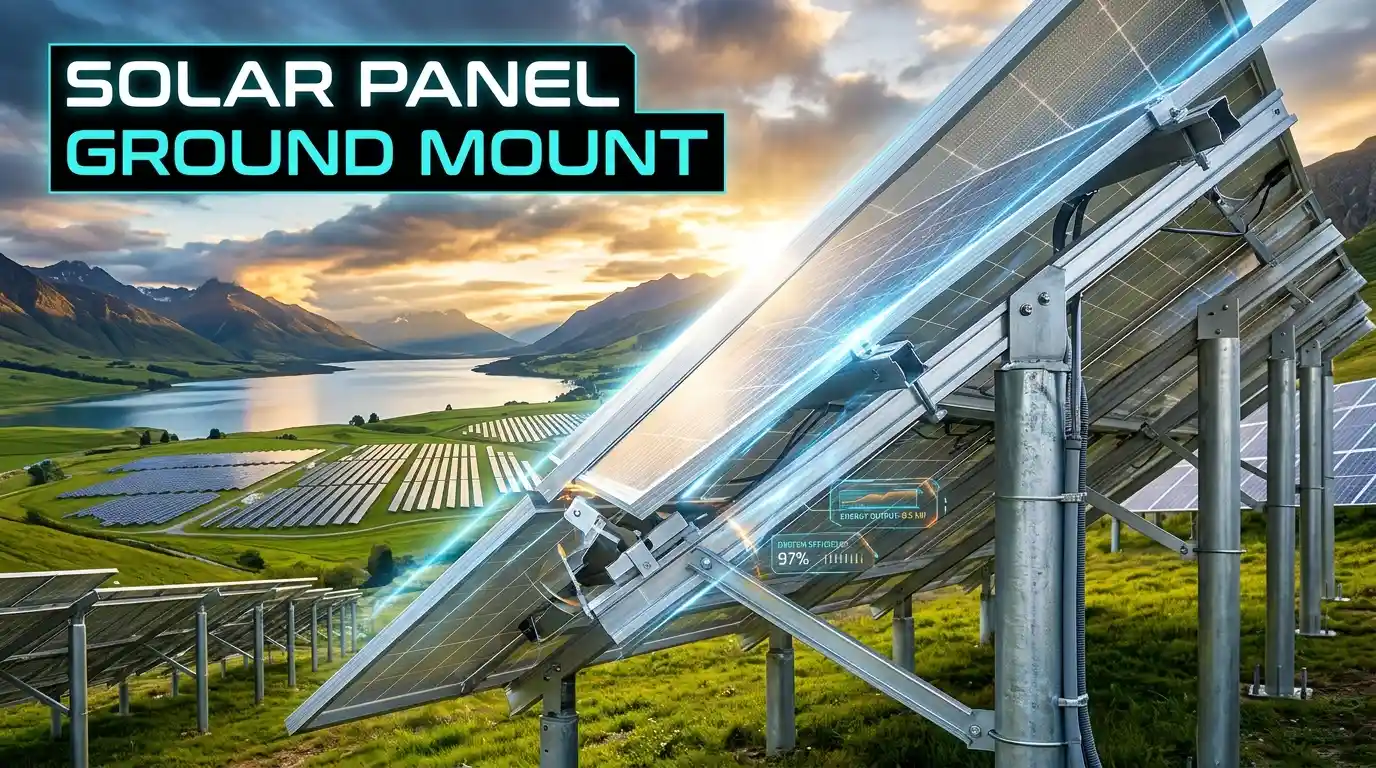
4. Ground Mount Solar Panels: Frames, Kits & DIY
Solar panel ground mounts are freestanding structures installed in your yard, field, or open land. They’re ideal when your roof is shaded, faces the wrong direction, has structural issues, or simply isn’t large enough for your desired system size.
Types of Ground Mounts for Solar Panels
- Standard ground mount frame: Aluminum or steel posts driven or concreted into the ground, with horizontal rails for panel attachment. Most common choice for residential ground installations.
- Ground solar panel mounts — driven pier: Steel pipes driven 3–4 feet into the ground with hydraulic equipment. Faster than concrete, but requires firm soil.
- Ballasted ground mount: No ground penetration — heavy concrete blocks hold the frame in place. Ideal for rocky ground or areas where underground utilities prohibit digging.
- Ground mount for solar panels with tracking: Motorized single-axis or dual-axis trackers that follow the sun. Significantly more expensive but maximize daily output.
Ground Solar Panel Mount Design Considerations
Before buying a ground mount for solar panels, evaluate:
- Setback requirements: Most US counties require ground mounts to be set back 5–10 feet from property lines and structures. Check local zoning ordinances.
- Permit requirements: Ground-mounted solar systems almost always require a building permit. Hire an engineer to stamp the structural design for large systems.
- Soil type: Sandy or loose soil may need concrete footings. Clay or hard soil is ideal for driven piers.
- Orientation: Ground mounts can face any direction and be set at any tilt — unlike fixed roof systems. Aim for true south at a tilt equal to your latitude for maximum annual production.
Ground Mounted Solar Panel Kits
Ground mounted solar panel kits are complete packages that include frame, posts, rails, and all hardware. Popular DIY ground mount kit brands include Renogy, Shoals Technologies, and IronRidge. A kit for a 4-panel system runs $200–$500; an 8-panel kit costs $400–$900.
For a solar panel ground mount DIY project, use Schedule 40 steel pipe (2″ diameter minimum) for posts, concrete footings at least 36″ deep (below frost line), and Grade 304 stainless steel hardware throughout. Design your frame for your local wind speed rating (ASCE 7 standard) — your local building department will have this information.
5. Solar Panel Pole Mount: Top & Side Mount Systems
A solar panel pole mount elevates panels on a single vertical steel pole — the most flexible and ventilated mounting option available. Pole mounted solar panels are popular for off-grid cabins, remote water pumping, rural properties, and wherever a roof or ground frame isn’t practical.
Top-of-Pole vs. Side-of-Pole Mount
| Type | Description | Panel Capacity | Best For |
|---|---|---|---|
| Top-of-Pole Mount | Panels mounted horizontally across the top of a single pipe | 1–16 panels | Off-grid homes, cabins, RV parks |
| Side-of-Pole Mount | 1–2 panels clamped to the side of an existing pole | 1–4 panels | Security cameras, lighting, small off-grid devices |
| Multi-Pole Tracker | Motorized pole system that tracks sun east to west | 4–24 panels | Maximizing output in open land |
Solar Panel Pole Mount Kit
A solar panel pole mount kit includes the top mounting plate, tilt adjustment brackets, clamps, and all hardware needed to attach the kit to a standard round steel pipe (schedule 40, 2″–4″ diameter depending on system size). Renogy, Tamarack Solar, and Iron Edison sell complete solar panel pole mount kits ranging from $80 for a single-panel kit to $600+ for a 12-panel top-of-pole assembly.

The solar panel mounting pole itself is typically a 4″ schedule 40 steel pipe, 10–14 feet long, set in a concrete footing 3–4 feet deep. Pole diameter and footing depth must be engineered for your local wind speed — consult your local building department or a structural engineer.
The solar panel pole mounts can also incorporate a solar panel tilt mount adjustment system, allowing you to change the panel angle seasonally for optimal sun capture.
6. Mounting Solar Panels on RV: Complete Guide
Mounting solar panels on RV roofs is one of the most popular DIY solar projects in the US. A properly installed RV solar system adds reliable off-grid power for camping, boondocking, and full-time van or RV living.
RV Solar Panel Mounting Options
- Z brackets for RV: The simplest and most affordable RV mounting option. Four Z brackets attach to the corners of the panel frame and bolt through the RV roof. Each penetration must be sealed with Dicor lap sealant or self-leveling butyl sealant.
- Tiltable RV brackets: Adjustable brackets that let you tilt panels toward the sun when parked. Adds 15–25% more power output. Folds flat for highway driving to reduce wind resistance and drag.
- Non-penetrating RV mount: Uses adhesive or suction to attach panels without drilling. Only suitable for lightweight flexible panels (under 10 lbs per panel).
Mounting Solar Panels on RV Roof: Step-by-Step
-
1
Plan Your Layout
Measure your RV roof and plan panel placement. Account for vents, A/C units, and antennas. Leave at least 6″ from the roof edge on all sides for safety and airflow. For mounting solar panels on RV roof, most owners place panels lengthwise across the roof.
-
2
Mark Bracket Positions
Position your panel and mark all four bracket holes with a marker. Double-check spacing — the bracket holes must align with the panel’s mounting holes (typically 1.5″–2″ from the frame edge).
-
3
Drill & Seal
Drill pilot holes slightly smaller than your lag screw diameter. Apply a generous bead of Dicor lap sealant around each hole before inserting screws. Every single penetration must be sealed — RV roof leaks from unsealed solar mounts are one of the most common and costly mistakes.
-
4
Attach Z Brackets / RV Mounting Brackets
Bolt solar panel mounting brackets for RV through the roof into wood blocking or the metal roof framing. Tighten firmly but don’t overtorque — RV roofing material compresses. Apply a second layer of sealant over the bracket base after tightening.
-
5
Mount the Panel & Run Wiring
Set the panel onto the brackets and bolt through the panel frame. Run wiring through a cable entry gland (not a bare hole) — seal the entry point with sealant. Route wires along the roof to prevent wind flutter at highway speeds. For rv solar panel mounting brackets, use stainless steel hardware throughout to prevent rust.
Most RV roofs have a weight limit of 150–250 lbs distributed across the roof area. A standard 400W solar panel weighs 40–50 lbs. Account for bracket weight too. For a solar panel mount rv installation with multiple panels, check your RV manufacturer’s roof load specs before proceeding. Exceeding the limit can deform roof structures.
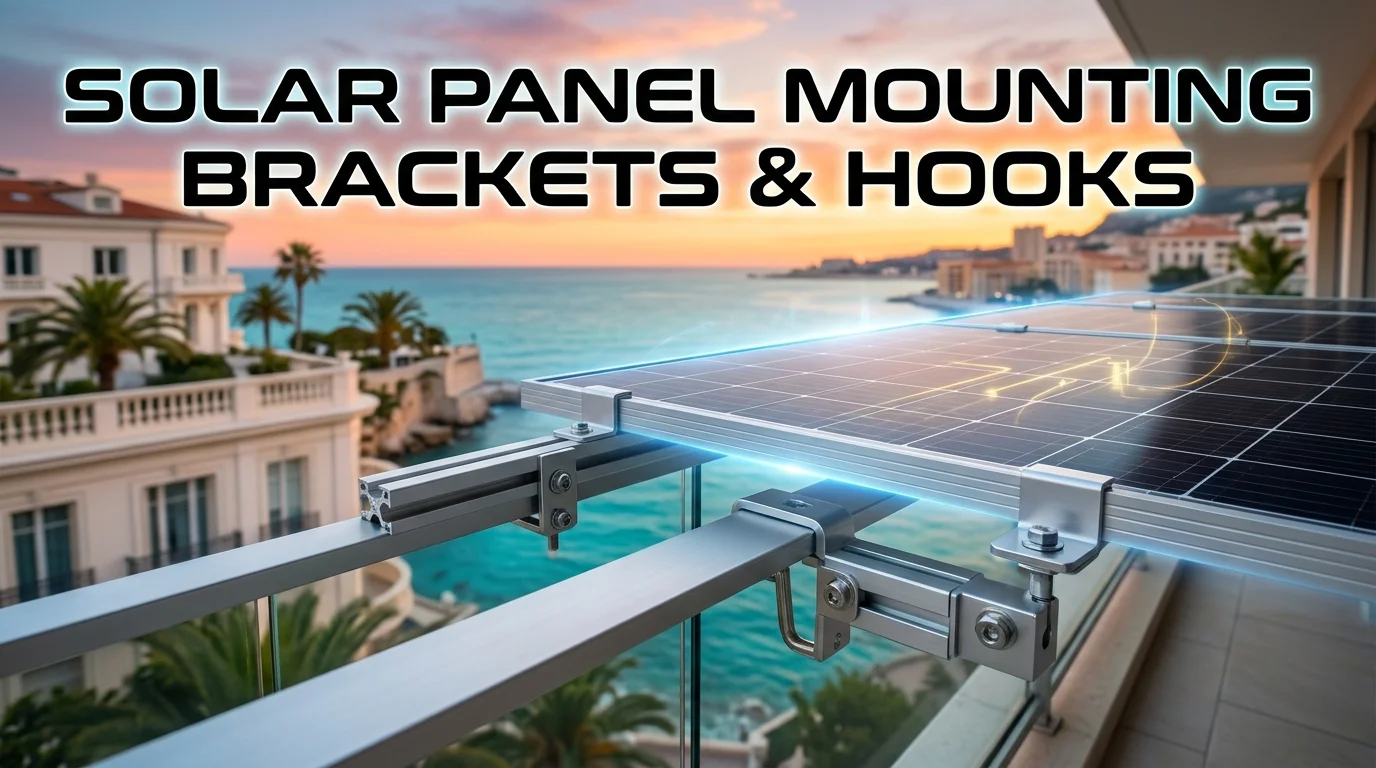
7. Wall Mounted Solar Panels & PV Panels
Wall mounted solar panels attach to the vertical face of a building — a south-facing wall, garage wall, balcony railing, or fence. While less common than roof or ground systems, wall mounted solar PV panels are a viable option for homes with limited roof space or unfavorable roof orientation.

A Blink solar panel mount is a specific mounting accessory made by Blink (the security camera brand) for their outdoor cameras. It attaches the Blink solar charging panel to a wall, fence post, or eave — keeping the camera battery topped off without wire runs. If you own a Blink Outdoor or XT2 camera, the Blink solar panel mount is a plug-and-play accessory available directly from Amazon for $20–$30.
When Wall Mounting Makes Sense
- Flat roofs with HVAC equipment covering usable space
- Urban buildings where the roof is shared or inaccessible
- South-facing walls in northern latitudes (above 45°N) where steep angles help in winter
- Aesthetic installations where the panels are intended to be visible as a design feature
- Balcony solar — popular in Germany and increasingly in US apartments
A solar panel wall mount uses heavy-duty lag bolts anchored into studs or masonry anchors into concrete/brick. The bracket must support the full panel weight plus wind loads in a perpendicular orientation — use engineer-stamped hardware for any wall mount exceeding 4 panels.
Mounting solar panels on wall surfaces requires the panel to be angled outward (typically 15°–30° from vertical) using adjustable tilt brackets to face the sky rather than the horizon. A vertical flat wall mount receives significantly less direct sun.
8. Z Brackets for Solar Panels: Types, Uses & Installation
Z brackets for solar panels — also called Z-shaped mounting brackets or corner mounts — are the simplest and most affordable bracket type available. A solar panel Z bracket has a Z-shaped profile: one flange bolts to the surface, a middle web spaces the panel off the surface for ventilation, and the top flange bolts to the panel frame.
Types of Z Brackets
Standard Z Bracket
Fixed height, one piece. Cheapest option. Used on flat surfaces, RV roofs, and shed roofs.
Adjustable Z Bracket
Height-adjustable to accommodate different panel thicknesses and uneven surfaces.
Tilt Z Bracket
Adds an angled offset to give the panel a fixed tilt (usually 10°–30°) even on a flat surface.
RV Z Bracket
Low-profile version specifically designed to minimize height above RV roof for reduced wind resistance.
Solar Panel Z Brackets — Installation Tips
- Use 4 Z brackets per panel — one at each corner of the panel frame
- Space brackets so each one is within 1/4 of the panel’s length from the corner
- Always use stainless steel bolts and lock washers to prevent vibration loosening
- Solar panel Z bracket material should be anodized aluminum (Grade 6061 or 6063) — never untreated steel which will rust
- Leave a 1/2″ gap at the bottom of the panel for water and debris drainage
- Solar panel brackets mountings on RV roofs need sealant at every penetration point — no exceptions
Z brackets for solar panels cost $5–$15 per bracket. A 4-panel system needs 16 brackets — about $80–$240 total. Brands like Renogy, Heyco, and BougeRV sell complete solar panel z bracket sets with all hardware included.
9. Rail Mount Solar Panels & Racking Systems
The rail mount solar panel system is the industry standard for residential and commercial rooftop installations in the US. Rail mounted solar panels sit on horizontal aluminum extrusion rails that span across multiple panels, distributing structural load evenly across many roof attachment points.
Components of a Solar Panel Rail Mount System
- Solar panel mounting rail: Extruded aluminum channel (T-slot or C-channel profile) that runs horizontally. Standard rail lengths: 8′, 10′, 12′, or custom. Rails carry the combined load of all panels to the roof attachment points.
- Solar panel rail mount brackets (L-feet): The connection between each rail and the roof rafter. L-feet are lag-bolted into rafters every 48″–64″ along each rail.
- End clamps: Clamp the outermost panels at their edges to the rail
- Mid clamps: Sit between two adjacent panels, clamping both simultaneously to the rail
- Splice: Connects two rail sections end-to-end with a mechanical connector
Solar Panel Racking Systems: Top Brands
| Brand | System | Best For | Price Range | Rating |
|---|---|---|---|---|
| IronRidge | XR100, XR1000 rails | Residential & commercial, all US climates | $180–$600 / system | ⭐ Industry Leader |
| Unirac | SolarMount, RM Pro | Residential, excellent for low-slope roofs | $150–$500 / system | ⭐ Top Rated |
| Schletter | FlatRoof, PitchedRoof | Commercial, engineered large systems | $300–$1,000+ / system | Commercial Grade |
| Renogy | Aluminum Rail Kit | DIY homeowners, smaller arrays | $80–$250 / system | Great DIY Option |
| Rapid2 | Rapid2 Rail-Free | Fast installation, no rails needed | $200–$500 / system | Installer Favorite |
Solar panel racking systems — the full assembly of rails, brackets, and clamps — cost $150–$600 for a typical 6–10 panel residential system. Professional installers price racking labor separately at $500–$1,500 depending on system size and roof complexity.
10. Solar Panel Mounts for Metal Roof
Solar panel mounts for metal roof installations offer one of the most installer-friendly scenarios in the industry — especially for standing seam metal roofs, which allow zero-penetration mounting.
Standing Seam Metal Roof (Best Case)
Standing seam metal roofs have raised seams that run vertically down the roof. Solar panel mounts for shingle roof-style lag bolts are not needed — instead, S-5! seam clamps (or equivalent) grip the raised seam with set screws, providing an incredibly strong connection with zero roof penetrations and zero leak risk.
- S-5! brand clamps are the industry gold standard for standing seam solar mounts
- No drilling, no flashing, no sealant needed
- Installation is significantly faster than shingle roof mounting
- Roof warranty is fully preserved — no penetrations
Corrugated / Ribbed Metal Roof
Corrugated metal roofs require drilling through the ribs at the high points (never the low points where water collects). Use self-drilling hex-head tek screws with neoprene EPDM washers that compress to seal the hole. Mounting solar panels on metal roof with corrugated sheets requires:
- Butyl tape or EPDM gaskets under each bracket base
- Stainless steel self-tapping tek screws — never carbon steel which rusts and wicks water
- Bracket designed for corrugated profile (curved base or adjustable standoff)
Solar Panel Mounts for Metal Roof — Hood Mounted
A hood mounted solar panel refers to a mounting system where the bracket installs over the ridge or hood profile of metal roofing without penetrating the metal — similar to standing seam clamps but designed for ribbed profiles. These are gaining popularity for metal agricultural buildings and barns.

11. Adjustable Solar Panel Tilt Mount & Sun Tracker
An adjustable solar panel mount lets you change the panel tilt angle seasonally (or more frequently), capturing more sun when the sun is lower in winter and less steep in summer. According to solar tech research, adjustable tilt mounts can increase annual energy output by up to 25% compared to a fixed flat mount.
Solar Panel Tilt Mount: Optimal Angles by Season
| Season | Optimal Tilt Formula | Example (Latitude 35°N — Tennessee) |
|---|---|---|
| Summer | Latitude − 15° | 35° − 15° = 20° tilt |
| Spring / Fall | Equal to latitude | 35° tilt |
| Winter | Latitude + 15° | 35° + 15° = 50° tilt |
| Year-Round Fixed | Equal to latitude | 35° tilt (best single fixed angle) |
Sun Tracker for Solar Panels
A sun tracker for solar panels is a motorized mounting system that automatically rotates panels to follow the sun’s path across the sky throughout the day. There are two types:
- Single-axis tracker: Rotates east–west, following the sun’s daily arc. Increases output 20–35% over fixed mount. Most common for commercial ground arrays.
- Dual-axis tracker: Adjusts both east–west and seasonal tilt. Can increase output by 35–45% over fixed. Most expensive option — typically only cost-effective for large commercial or research installations.
For residential use, single-axis trackers on pole mounts are the most practical tracker option. Brands include AllEarth Renewables and Solar World. Cost: $2,000–$6,000 additional over a fixed ground mount system.
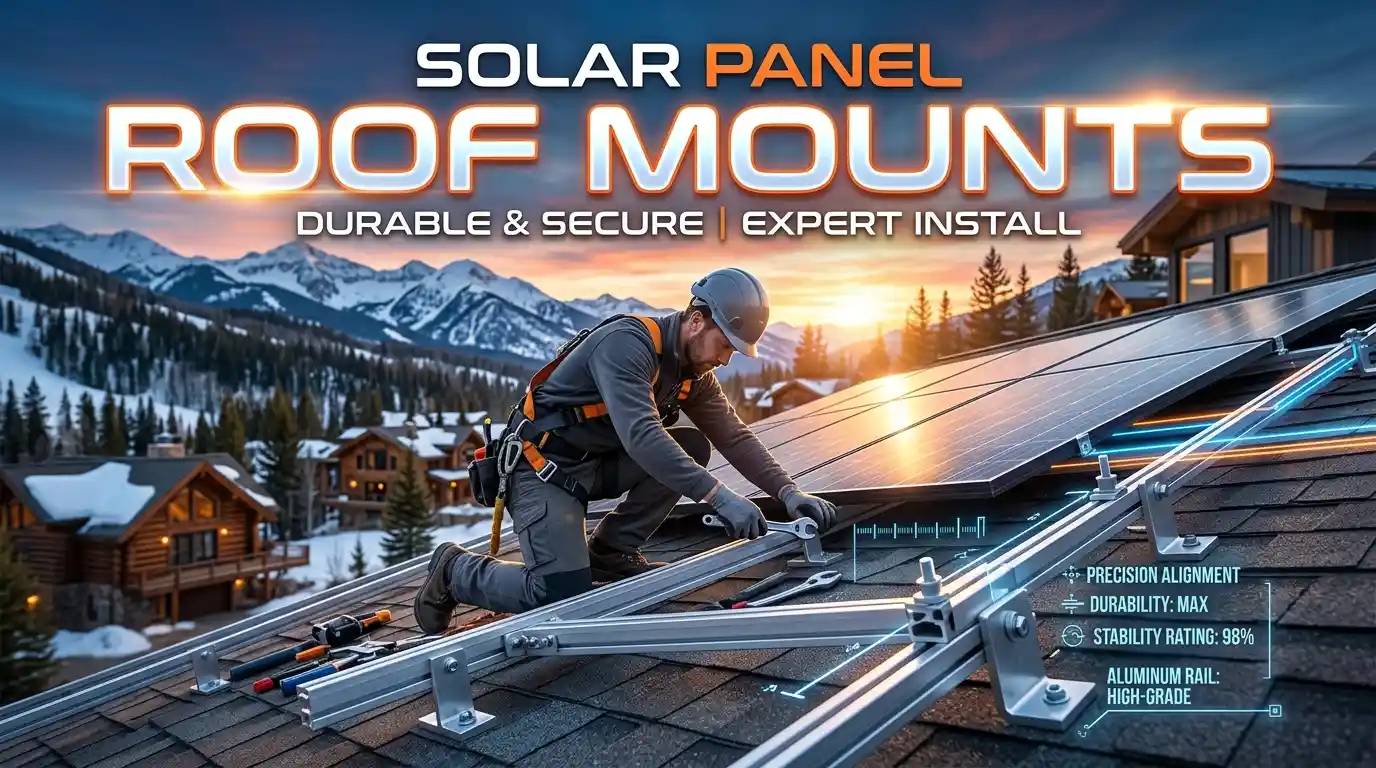
12. How to Mount Solar Panels: Step-by-Step Installation Guide
Here is the standard installation process for a residential roof rail mount system — the most common installation type in the US:
-
1
🔍 Structural Assessment & Permit
Verify your roof can support the panel load (typically 3–4 lbs/sq ft added dead load). Pull a building permit — most US jurisdictions require one for solar installations. Unpermitted work creates problems at home sale and insurance claims. Obtain a structural engineering letter if your roof is older than 15 years.
-
2
📐 Mark Rafter Locations
Use a stud finder from inside the attic or externally on the roof to mark all rafter positions. Rafters are typically 16″ or 24″ on center. Mark their centerlines on the roofing surface with chalk — every solar panel installation bracket must land on a rafter.
-
3
🔧 Install Roof Attachments
Remove or lift shingles at each L-foot location. Apply roofing sealant, position the flashing base, drill a 5/16″ pilot hole into the rafter center, and drive a 5/16″ × 3.5″ lag bolt (minimum) through the flashing into the rafter. Reseal around the penetration with roofing sealant. Space attachments every 48″–64″ along each rail run.
-
4
📏 Attach & Level Mounting Rails
Bolt the solar panel mounting rail to the L-foot bolts. Use a 4-foot level and string line to ensure rails are perfectly level horizontally. Shim L-feet if needed. Connect rail sections with splice bars, leaving 1/8″ expansion gap between rail sections. Rails must be parallel with consistent spacing matching your panel height.
-
5
⚡ Install Grounding
Attach grounding lugs to the rails per NEC Article 690.43. Bond all rails together and run a grounding conductor to the system ground. This step is non-negotiable for safety and code compliance — a grounded mounting frame prevents shock hazards if a live wire contacts the frame.
-
6
☀️ Mount Solar Panels
Lift panels onto the rails (use a panel-lifting tool or have a second person assist — panels are heavy). Slide end clamps onto the rail at the array edges. Place mid clamps between adjacent panels. Torque all clamp hardware to manufacturer specification (typically 12–18 Nm). Do not overtighten — it deforms panel frames.

-
7
🔌 Complete Electrical Connections
Connect panel MC4 connectors in your designed series/parallel configuration. Route wiring through conduit along the rail to the roof penetration point. Use a waterproof conduit fitting at the roof entry. Never leave bare wires exposed on the roof surface.
-
8
✅ Inspection & System Commissioning
Request your local building department inspection. Inspectors will check mounting bolt torque, grounding, and electrical wiring. After passing inspection, complete the interconnection agreement with your utility and commission the system through your inverter’s startup procedure.

13. Solar Panel Mounting Hardware, Kits & Bracket Hardware
Solar Panel Mounting Brackets with Hardware — What’s Included
Quality solar panel mounting brackets with hardware kits should include:
- Stainless steel or hot-dip galvanized lag bolts (5/16″ × 3.5″ minimum)
- Anodized aluminum L-foot brackets
- Aluminum mounting rails (standard 98″ / 116″ lengths)
- Stainless steel T-slot bolts and nuts for clamps
- End clamps and mid clamps in appropriate sizes for your panel frame thickness
- Flashing or Quick Mount PV waterproofing
- Grounding lugs and bonding hardware
- Splice bars for joining rail sections
Solar Brackets for 365W Solar Panels
For solar brackets for 365W solar panels (and similarly sized 350W–400W panels), use standard residential rail mount hardware. A 365W panel is typically 66″×40″ in size with a 35mm or 40mm frame depth. Ensure your mid and end clamps are compatible with your specific frame thickness — most clamps accommodate 30–50mm frames.
Solar Panel Mounting Hardware Materials
| Material | Corrosion Resistance | Strength | Cost | Recommended? |
|---|---|---|---|---|
| Anodized Aluminum (6061-T6) | Excellent | High | Medium | ✅ Best for rails & brackets |
| 304 Stainless Steel | Excellent | Very High | Higher | ✅ Best for bolts & clamps |
| Hot-Dip Galvanized Steel | Good | Very High | Low–Medium | ✅ OK for ground mount frames |
| Powder-Coated Steel | Fair (coating chips) | High | Low | ⚠️ Acceptable, not preferred |
| Untreated / Bare Steel | Poor — rusts quickly | High | Very Low | ❌ Never use outdoors |
14. Average Amount of Solar Panels for Home: How Many Do You Need?
Understanding the average amount of solar panels for home helps you plan your mounting system size from the start. The right number of panels determines how many brackets, rails, and roof attachment points you’ll need.
Solar Panels Needed by Home Size
| Home Size | Avg. Annual Usage | System Size Needed | Number of 400W Panels | Roof Space Required |
|---|---|---|---|---|
| Small (1,000 sq ft) | ~6,000 kWh/yr | 4–5 kW | 10–13 panels | ~200–260 sq ft |
| Average (1,800 sq ft) | ~10,500 kWh/yr | 7–8 kW | 18–20 panels | ~360–400 sq ft |
| Large (2,500 sq ft) | ~14,000 kWh/yr | 9–11 kW | 23–28 panels | ~460–560 sq ft |
| Very Large (3,500+ sq ft) | ~18,000+ kWh/yr | 12–15 kW | 30–38 panels | ~600–760 sq ft |
These figures are US averages based on EIA data. Your actual number depends on your electricity rate, local peak sun hours (4–7 hours/day across the US), panel efficiency, and shading. Use a solar calculator like PVWatts (free, from NREL) to get a precise estimate for your exact address.
For planning your solar panel mounting system: multiply your panel count by 2 rail runs per row, with L-foot brackets every 48″ along each rail. A 20-panel, 2-row system typically needs 40 L-foot brackets and 8 rail sections.
15. Frequently Asked Questions
🔩 Solar Panel Mounting: Key Takeaways
- Roof rail mounts (L-foot + rails + clamps) are the US standard for residential shingle roofs
- Z brackets are the simplest option for RVs, flat roofs, and DIY flat surface installs
- Ground mounts give maximum flexibility for angle, direction, and maintenance access
- Metal standing seam roofs use S-5! seam clamps — zero roof penetrations needed
- RV mounting: seal every penetration with Dicor — no exceptions
- Always use anodized aluminum brackets and stainless steel hardware — never bare steel
- Adjustable tilt mounts boost annual output by up to 25% vs fixed flat mount
- All brackets must attach to structural members (rafters, studs, concrete footings) — never sheathing alone
- Pull a permit and get an inspection — protects your insurance and home resale value